Respond to a clarification request on an RNI


To respond, open the request from your Huron Inbox, edit the Reportable New Information (RNI) submission, then select Submit Response in the study workspace.

Important: Saving your edits in the smart form does not send them to ORRP. Your response is only received after you select Submit Response.

When you get a clarification request

After you submit a Reportable New Information (RNI) report, a staff member from the Office of Responsible Research Practices (ORRP) screens it. If they find inconsistencies or missing components, they email you a request for clarification.

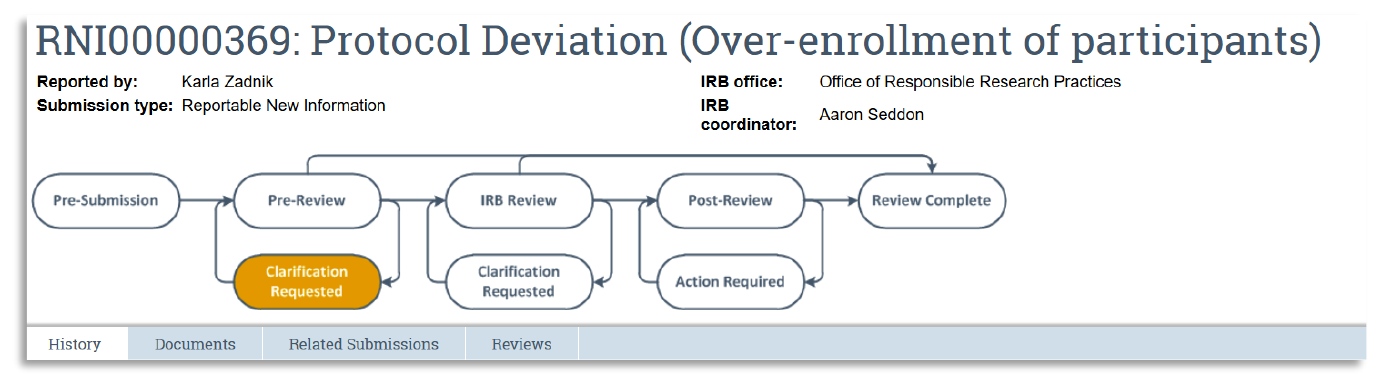
The submission stays in the Pre-Review stage, with the status Clarification Requested, until you respond.
RNI submission header showing the workflow stages, with Clarification Requested (under Pre-Review) highlighted as the current status.


Open the request

  1. Log in to Huron.
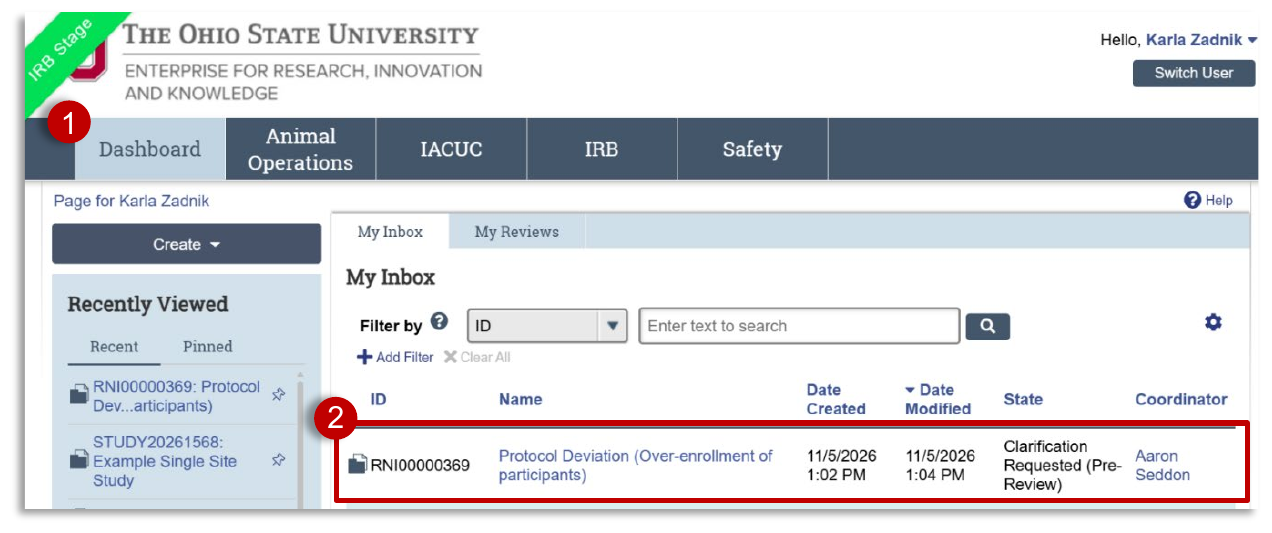
  2. On your Dashboard, find the request in your Inbox and select it to open the study workspace.

    Huron dashboard. Callout 1 marks the Dashboard tab. Callout 2 marks the RNI in the My Inbox list with the state Clarification Requested (Pre-Review).

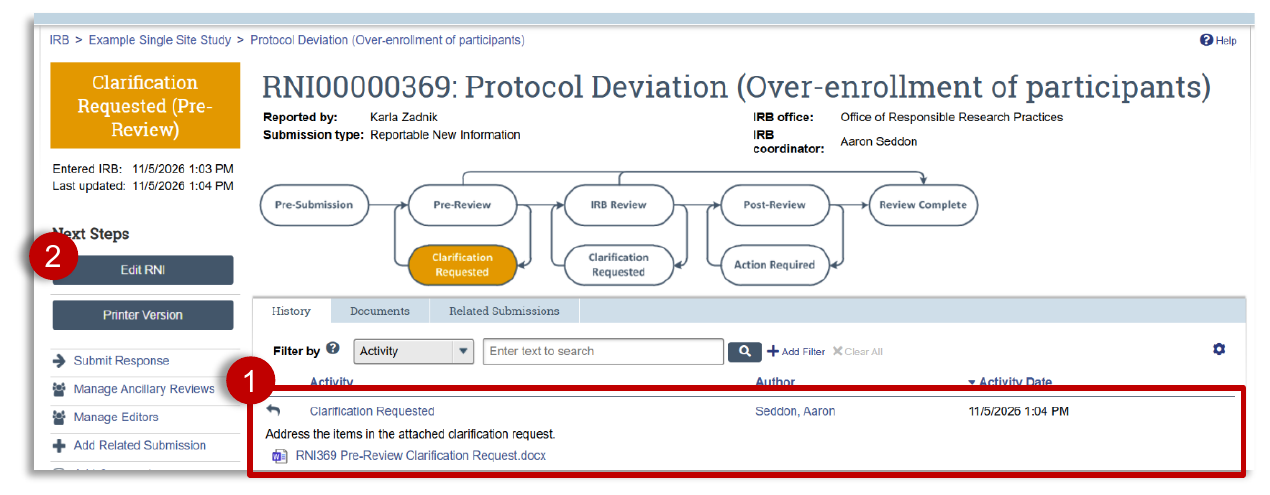
  3. In the History tab, select the clarification request to see the details. For requests with several items, an attached Word document lists everything that needs to be addressed.
  4. Select Edit RNI to open the smart form.

    RNI study workspace. Callout 1 marks the Clarification Requested entry in the History tab, which includes an attached Word document. Callout 2 marks the Edit RNI button under Next Steps.

Make your changes

Go to the sections of the smart form named in the request and make your edits.

Upload a revised document

To replace a Word document you already attached, such as the RNI Supplemental Information Form:
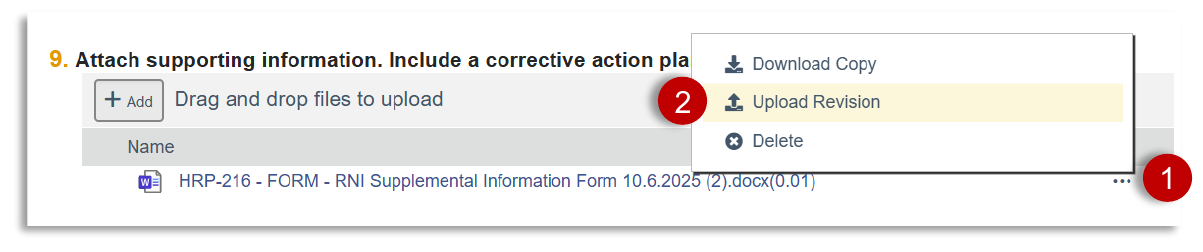
  1. Select the ellipsis (…) next to the document.
  2. Select Upload Revision.

    Attached document in the smart form. Callout 1 marks the ellipsis button next to the file. Callout 2 marks Upload Revision in the menu that opens.

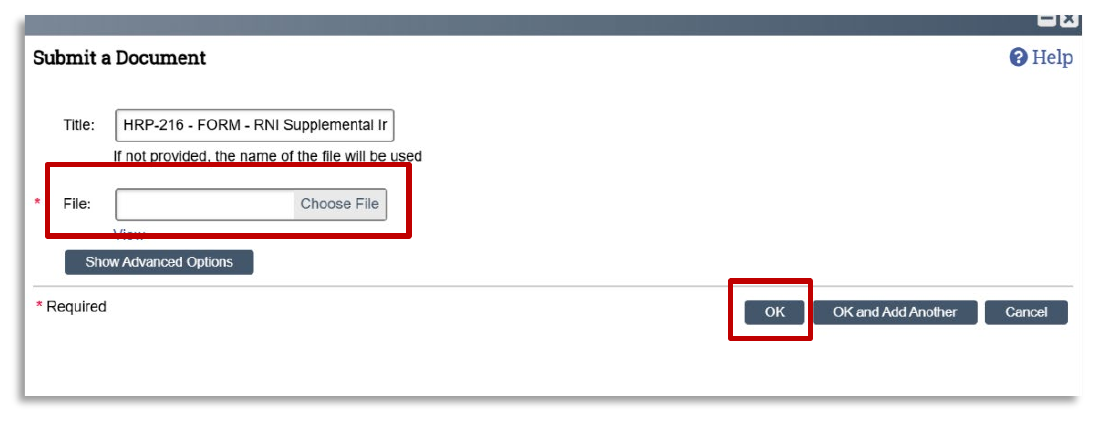
  3. Choose the revised file and select OK.

    Submit a Document dialog with the File field’s Choose File button and the OK button highlighted.

Tip: Use Upload Revision instead of adding a new file, so reviewers see the version history in one place.
Check your changes (optional)

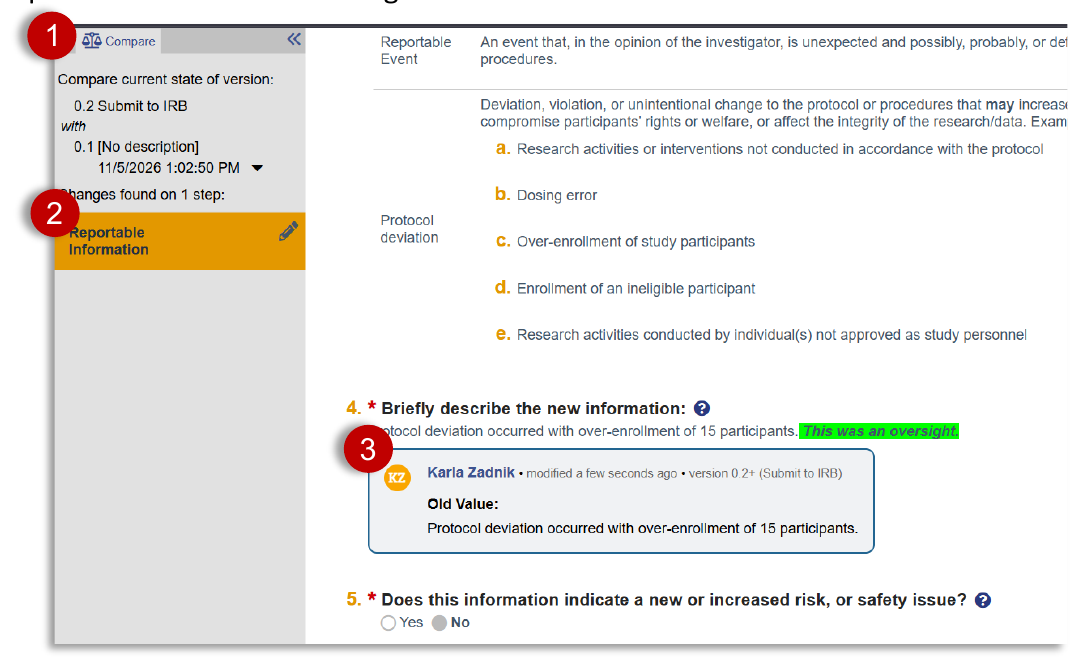
  1. Select Compare at the top of the left navigator.
  2. A pencil icon appears next to each section you changed.
  3. Each change shows when it was made, who made it, and the old value.

Smart form in Compare mode. Callout 1 marks the Compare link in the left navigator. Callout 2 marks the changed section, Reportable Information, with a pencil icon. Callout 3 marks a change note showing who made the change, when, and the old value.

Submit your response (required)

  1. Exit the smart form to return to the study workspace.
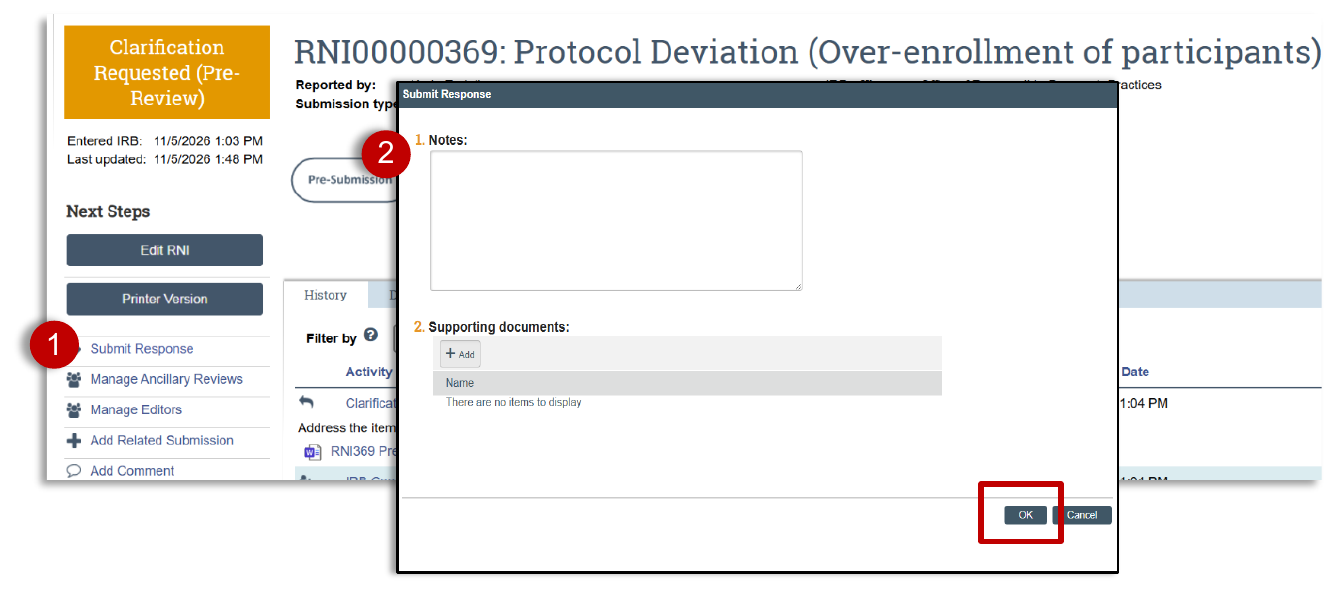
  2. Under Next Steps, select Submit Response.
  3. In the pop-up, add any notes or supporting documents for the reviewer, then select OK.

    Study workspace with the Submit Response pop-up open. Callout 1 marks the Submit Response link under Next Steps. Callout 2 marks the Notes field in the pop-up, and the OK button is highlighted.

Reminder: If you skip Submit Response, the submission stays in Clarification Requested and ORRP does not see your changes.

What happens next

The submission returns to Pre-Review, and the assigned IRB coordinator screens your response. 

Get help

Contact the IRB coordinator assigned to your submission. Their name appears next to IRB coordinator at the top of the submission.


Article ID: 154
Created: November 9, 2026
Last Updated: November 9, 2026

Online URL: https://ohiostateresearch.knowledgebase.co/article/respond-to-a-clarification-request-on-an-rni-154.html